Saturday, February 23, 2013

SpringMVC Multi Row Form Binding and Validation

In this tutorial, I will show you how to bind and validate a multi row form, as figure bellow.


  • For binding Multi Row, I use the <spring:bind> tag lib
  • For validation, I use the manual validation (by inheriting the spring validator interface)

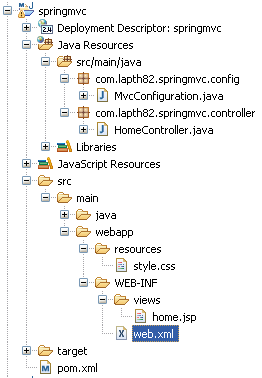
To start, let create these beans:


Option.java
public class Option {

    private String value;

    private String label;

...

}
This bean used in creating the list of option in select tag, the list of checkboxs....
User.java
public class User {

    // a text box

    private String name;

    // check boxs

    private String[] hobbies;

    // a radio

    private String sex;

    // options

    private String[] countries;

...

}

This bean store the information of an User

And a form bean UserForm.java
public class UserForm {

    private List<User> lstUser;

...

}

There is only one user list in this form

Modify User Form


We need these tag lib
<%@taglib uri="http://java.sun.com/jsp/jstl/core" prefix="c"%>

<%@taglib uri="http://www.springframework.org/tags" prefix="spring"%>

The form attribute is users
<form:form action="/multirow/modifyUser" method="POST" modelAttribute="users">

To loop through a list, we use the core tag lib
<c:forEach items="${users.lstUser}" var="user" varStatus="loopStatus">

As the figure above, I will show you 4 types of component

1. Text Box


<spring:bind 

    path="users.lstUser[${loopStatus.index}].name">

        <input 

            type="text" 

            name="<%=status.getExpression() %>"

            value="<%=status.getValue() %>"

            />

</spring:bind>

  • Make attention at the path of spring:bind tag lib, here we are defining a list of name attribute
  • status.getExpression() returns the html name
  • status.getValue() returns the value of name attribute

2. Multi Check box


<spring:bind path="users.lstUser[${loopStatus.index}].hobbies">

    <c:forEach items="${lstHobby}" var="hobby">

        <c:set var="checkMe" value="" />

        <c:forEach items="${status.actualValue}" var="curValue">

            <c:if test="${curValue == hobby.value}">

                <c:set var="checkMe" value="checked" />

            </c:if>

        </c:forEach>

        <input 

            type="checkbox" 

            name="<%=status.getExpression() %>"

            value="${hobby.value}"

            <c:out value="${checkMe }"/>

        />${hobby.label }

    </c:forEach>

</spring:bind>

3. Radio Button


<c:set var="male" value="M"/>

<c:set var="female" value="F"/>

<spring:bind path="users.lstUser[${loopStatus.index}].sex">

    <input 

        type="radio"

        name="<%=status.getExpression()%>"

        value="${male }"

        <c:if test="${male == status.value }">checked</c:if>

    />Male

    <input 

        type="radio"

        name="<%=status.getExpression()%>"

        value="${female }"

        <c:if test="${female == status.value }">checked</c:if>

    />Female

    <div><c:out value="${status.errorMessage }" /></div>

</spring:bind>

4. Select


<spring:bind path="users.lstUser[${loopStatus.index}].countries">

    <select name="<%=status.getExpression() %>">

        <option value="NONE">---SELECT---</option>

        <c:forEach items="${lstCountry }" var="country">

            <c:set var="selectMe" value="" />

            <c:forEach items="${status.actualValue}" var="curValue">

                <c:if test="${curValue == country.value}">

                    <c:set var="selectMe" value="selected" />

                </c:if>

            </c:forEach>

            <option 

                value="${country.value }"

                ${selectMe } 

            >

                ${country.label }

            </option>

        </c:forEach>

    </select>

</spring:bind> 

Tip
When we compare 2 variables of type String, the <c:if test> uses the equals function to compare them

That is enough for binding a mutil row form, next we discuss about validation
Here I just show you how to create a error message for an attribute in list.
public void validate(Object obj, Errors errors) {

    UserForm form = (UserForm) obj;

    List<User> lstUser = form.getLstUser();

    if (lstUser == null) {

        return;

    }

    for (int i = 0; i < lstUser.size(); i++) {

        User user = lstUser.get(i);

        if (user.getName() == null || "".equals(user.getName().trim())) {

            errors.rejectValue("lstUser[" + i + "].name", "user.name.required");

        }

    }

}

The difference with the validation of a bean is the error field name is under list format errors.rejectValue("lstUser[" + i + "].name.

To display an error message on form, we use status.errorMessage in <spring:bind>
<spring:bind path="users.lstUser[${loopStatus.index}].name">
    ...
    <span class="errors"><c:out value="${status.errorMessage }" /></span>    
</spring:bind>

Related:

References:
Source code:

Tuesday, February 19, 2013

SpringMVC Form Tag Lib Input + Textarea

For binding data on a jsp page to a form, one of the easiest ways is using spring form tag.
In this article, I will show you how to bind form data by using:
  • <form:input> for a text box
  • <form:textarea> for a text area
  • <form:hidden> for a hidden field

1. Form Bean

First let have a look to bean

public class User {

 // a text box
 private String name;

 // textarea
 private String about;

 // hidden
 private String hidden;....
}

To store data of these tags, we need only the attribute with String type.

2. Form Tags

To create a form, we use this syntax:
<form:form action="/textbox/modifyUser" method="POST" commandName="user">

action="/textbox/modifyUser" means that this form submit data to action with request mapping is "modifyUser"
mothod="POST" means this form for posting data
commandName="user" means the form bean is named "user", the default is "command"

To generate a text box, we use this syntax:
<form:input path="name" /> 

This command will generate a text box with name and id is name

To generate a text area, we use this syntax:
<form:textarea path="about" cols="15" rows="4"/>

This command will generate a text area with name and id is about

To generate a hidden field, we use this syntax:
<form:hidden path="hidden"/>


This command will generate a hidden field with name and id is hidden

3. In Controller


@RequestMapping(value = "/modifyUser", method = RequestMethod.GET)
public ModelAndView modifyUser(@ModelAttribute("user") User user) {
 // do some thing here, e.g: update database, ...
 return new ModelAndView("viewUser", "user", user);
} 

Only one thing need to make attention is the annotation @ModelAttribute("user"), it means that the form bean is named "user"


References:
Source code:

Monday, February 18, 2013

SpringMVC Form Tag Lib Checkbox + Checkboxs

For binding data on a jsp page to a form, one of the easiest ways is using spring form tag.
In this article, I will show you how to bind form data by using:
  • <form:checkbox>
  • <form:checkboxes>

1. Form Bean


public class User {

 // a check box
 private boolean married;

 // checkboxs
 private String[] hobbies;
....
}

To store status of multi checkbox, we must use a array of String.

2. Form Tags


To generate a checkbox, we use this syntax:
<form:label path="married">Married</form:label>
<form:checkbox path="married" /> 

  • form:label path="married" means generate a label for user.married
  • form:checkbox path="married" generated the checkbox

To generate a list of checkbox button, we use this syntax:
<form:checkboxes 
 path="hobbies" 
 items="${lstHobby}" 
/>

  • path="hobbies" means the selected checkbox values bind to hobbies attribute
  • items="${lstHobby}" means the check value and checkbox label are stored in lstHobby

4. In Controller

We initialize the item list in GET method
@RequestMapping(value = "/modifyUser", method = RequestMethod.GET)
public ModelAndView modifyUser() {

  Map<String, String> lstHobby = new HashMap<String, String>();
 lstHobby.put("1", "Music");
 lstHobby.put("2", "Game");
 lstHobby.put("3", "Reading");

 ModelAndView modelView = new ModelAndView("modifyUser");
 modelView.addObject("lstHobby", lstHobby);
 modelView.addObject("user", this.user);
  
 return modelView;
} 

As you see, the lstHobby is a Map, the key of Map is checkbox value and the value of Map is checkbox label

Note
The order of items is not guaranteed in JSP

References:
Source code:
  • For the demonstration, please download source code from HERE
  • My repository on Github

SpringMVC Form Tag Lib Radio + Radios

For binding data on a jsp page to a form, one of the easiest ways is using spring form tag.
In this article, I will show you how to bind form data by using:
  • <form:radiobutton>
  • <form:radiobuttons>

1. Form Bean


public class User {

     // a radio
 private String sex;
 
 // radios
 private String skin;
....
}

2. Form Tags


To generate a radio button, we use this syntax:
<form:radiobutton 
 path="sex" 
 value="M"
/> 

  • path="sex" means the selected radio value binds to sex attribute
  • value="M" the label of this radio

To generate a list of radio button, we use this syntax:
<form:radiobuttons 
    path="skin"
    items="${lstSkin}"
/>

  • path="skin" means the selected radio value binds to sex attribute
  • items="${lstSkin}" means the radio value and radio lable are stored in lstSkin

4. In Controller

We initialize the item list in GET method
@RequestMapping(value = "/modifyUser", method = RequestMethod.GET)
public ModelAndView modifyUser() {

 Map<String, String> lstSkin = new HashMap<String, String>();
 lstSkin.put("1", "White");
 lstSkin.put("2", "Black");
 lstSkin.put("3", "Brown");
 lstSkin.put("4", "Orange");
  
 ModelAndView modelView = new ModelAndView("modifyUser");
 modelView.addObject("lstSkin", lstSkin);
 modelView.addObject("user", this.user);
  
 return modelView;
} 

As you see, the lstSkin is a Map, the key of Map is radio value and the value of Map is radio label

Note
The order of items is not guaranteed in JSP

References:
Source code:
  • For the demonstration, please download source code from HERE
  • My repository on Github

SpringMVC Form Tag Lib Select + Option

For binding data on a jsp page to a form, one of the easiest ways is using spring form tag.

In this article, I will show you how to bind form data by using:
  • <form:select>
  • <form:option>
  • <form:options>

1. Option object

This object contain a pair value of each item in combo box or list box. It composes of item value and item label.

public class Option {

    private String  itemValue;

    private String  itemLabel;
...
}

2. Form Bean


public class User {

    // for a dropdown by using select tag
    private String skill1;

    // for a dropdown by using select, option and options tag
    private String skill2;

    // for multi select list box
    private String[] skills;
....
}

As above code, the attribute skills is used in binding a multi select list box.

3. Form Tags


To generate a dropdown box, we use this syntax:
<form:select 
    path="skill1" 
    items="${lstSkill}" 
    itemValue="itemValue" 
    itemLabel="itemLabel" 
/> 

  • path="skill1" means the selected value binds to skill1 attribute
  • items="${lstSkill}" means the items displayed in dropdown is stored in lstSkill
  • itemValue="itemValue" means the value of each item comes from field itemValue of Option object
  • itemLabel="itemLabel" means the label of each item is stored in field itemLabel of Option object

Another way to generate a combo box:
<form:select path="skill2">
    <form:option value="-" label="--Please Select"/>
    <form:options path="skill2" items="${lstSkill}" itemValue="itemValue" itemLabel="itemLabel" />
</form:select>


To generate a multi select list box, we use this syntax:
<form:select 
    path="skills"     
    multiple="true" 
    items="${lstSkill}" 
    itemValue="itemValue" 
    itemLabel="itemLabel" 
/>

  • path="skills", here the skills is an array of string
  • multiple="true"

4. In Controller

We initialize the item list in GET method
@RequestMapping(value = "/modifyUser", method = RequestMethod.GET)
public ModelAndView modifyUser() {

        /* We use a list of Option instead of Map */
        List<Option> lstSkill = new ArrayList<Option>();
 
        lstSkill.add(new Option("1", "Java"));
        lstSkill.add(new Option("2", "C#"));
        lstSkill.add(new Option("3", "PHP"));
        lstSkill.add(new Option("4", "C++"));
  
        ModelAndView modelView = new ModelAndView("modifyUser");
        modelView.addObject("lstSkill", lstSkill);
        modelView.addObject("user", this.user);
        return modelView;
} 

References:
Source code:
  • For the demonstration, please download source code from HERE
  • My repository on Github

Sunday, February 17, 2013

JSR 303 Custom Constraint Validator

In this article, we do not detail about JSR 303, for working with JSR 303, please read SpringMVC 3 + JSR 303 validation first.

Why we need a custom constraint validator, of course there are too much reasons for this question. Here I will show you 2 reasons:
  • I need a new validator to validate a field matches a specified pattern or not
  • I need to make the comparison between two fields (cross field validation)
So, let walk through these steps to realize this purpose

1. Import BeanUtils


<dependency>

    <groupId>commons-beanutils</groupId>

    <artifactId>commons-beanutils</artifactId>

    <version>1.8.3</version>

</dependency>

I use this util to get the value of a field in an object. This util is not important, you can use another one

2. Create a new properties used in Custom Constraint Validator

Create new ValidationMessages.properties file in folder src/main/resources
When <form:errors> renders error messages on form, it will look in this file, for more information, please read Message interpolation.

Note: by default, the normal Hibernate Validator still reads messages from application.properties

3. Create a Custom Constraint Validator

There are many ways to create a custom constraint validator, here I will show you two ways.

3.1 Custom Constraint Validator to validate a field

According to Hibernate, to create a custom constraint, the following three steps are required:
  • Create a constraint annotation
  • Implement a validator
  • Define a default error message

3.1.1 Constraint annotation

I do not detail about how to create an annotation in this article, for more detail, read it in oracle
@Target({ElementType.METHOD, ElementType.FIELD})

@Retention(RetentionPolicy.RUNTIME)

@Constraint(validatedBy=CodeValidatorImpl.class)

public @interface CodeValidator {

    String message() default "{code.not.correct}";


    Class<?>[] groups() default {};


    Class<? extends Payload>[] payload() default {};

}

  • Line 1, it means: this annotation is applied for a field
  • Line 2, it means: annotations of this type will be available at runtime by the means of reflection
  • Line 3 specifies the validator to be used to validate elements annotated with @CodeValidator
  • Line 5 defines the default message of this validator

3.1.2 Constraint validator

public class CodeValidatorImpl implements ConstraintValidator<CodeValidator, String> {


    @Override

    public void initialize(CodeValidator arg0) {

    }


    @Override

    public boolean isValid(String codeValue, ConstraintValidatorContext ctx) {

        return checkNull(codeValue, ctx) && checkMatched(codeValue, ctx);

    }


    private boolean checkNull(String codeValue, ConstraintValidatorContext ctx) {

        boolean isValid;


        if (codeValue == null || codeValue.equals("")) {

            isValid = false;

        } else {

            isValid = true;

        }


        if (!isValid) {

            ctx.disableDefaultConstraintViolation();

            ctx.buildConstraintViolationWithTemplate("{code.required}").addConstraintViolation();

        }


        return isValid;

    }


    private boolean checkMatched(String codeValue, ConstraintValidatorContext ctx) {

        Pattern pattern = Pattern.compile("[0-9a-zA-Z]*");


        Matcher matcher = pattern.matcher(codeValue);


        if (!matcher.matches()) {

            ctx.disableDefaultConstraintViolation();

            ctx.buildConstraintViolationWithTemplate("{code.contain.only}").addConstraintViolation();


            return false;

        } else {

            return true;

        }

    }

}

  • Line 1, ConstraintValidator<CodeValidator, String> type String means we use this validator to validate a String field.
  • Line 15, Make your validation in isValid function

3.1.3 Error message


In this example, I use ConstraintValidatorContext to create the custom error message
ctx.disableDefaultConstraintViolation();

ctx.buildConstraintViolationWithTemplate("{code.required}").addConstraintViolation();

These commands mean: Do not use the default message, let use the message with key = "code.required" in properties file (ValidationMessages.properties)

3.1.4 In Bean

Use the custom constraint as well as the normal constraint
public class User {


    @NotEmpty(message="user.firstName")

    private String firstName;


    @NotEmpty

    private String lastName;


    @CodeValidator

    private String code; 

....

}

3.2 Custom constraint for cross field validation

There are a few difference with the first way.

3.2.1 Constraint annotation

@Target({ElementType.TYPE, ElementType.ANNOTATION_TYPE})

@Retention(RetentionPolicy.RUNTIME)

@Constraint(validatedBy=PasswordMatchImpl.class)

public @interface PasswordMatch {


    String message() default "{notmatch.password}";


    Class<?>[] groups() default {};


    Class<? extends Payload>[] payload() default {};


    /**

     * First field

     */

    String password();


    /**

     * Second field

     */

    String repassword();

}

  • Difference in Target
  • We require 2 fields in declaration of annotation

3.2.2 Constraint validator

public class PasswordMatchImpl implements ConstraintValidator<PasswordMatch, Object> {


    private String password;


    private String repassword;


    @Override

    public void initialize(PasswordMatch pm) {

        password = pm.password();

        repassword = pm.repassword();

    }


    @Override

    public boolean isValid(Object obj, ConstraintValidatorContext ctx) {


        try {

            // get field value

            Object pw = BeanUtils.getProperty(obj, password);

            Object rpw = BeanUtils.getProperty(obj, repassword);


            return pw != null && rpw != null && pw.equals(rpw);

        } catch (Exception ex) {

            return false;

        }

    }

}

  • ConstraintValidator<PasswordMatch, Object>, the argument type is Object
  • Initialize the attribute in initialize function (it's the name of field, not the value of field)
  • We get value of field through the obj parameter

3.2.3 In Bean

@PasswordMatch(password="password", repassword="repassword")
public class User {

    @NotEmpty(message="user.firstName")
    private String firstName;

...

}

  • We validate for an object, not for a field
  • The parameters are required

4. Error message in JSP

As normal validation, we use <form:errors> to show the error message
<tr>
    <td><form:label path="firstName">First Name</form:label></td>
    <td>
        <form:input path="firstName" />
        <form:errors path="firstName" class="errors" />
    </td>
</tr>


References:
Source code:

SpringMVC 3 + JSR 303 validation with Hibernate validator 4.x

Spring provides many ways to validate an object, I have posted an article about Spring's Validator Interface, now I will show you how to validate an object with JSR 303 in Spring 3.x by using Hibernate validator.

1. Import Hibernate Validator 4.x to project


<dependency>
    <groupId>org.hibernate</groupId>
    <artifactId>hibernate-validator</artifactId>
    <version>4.3.1.Final</version>
</dependency>

This is an implementation of JSR 303

2. Validation annotation

There is a few difference with the validation by using Spring's Validator Interface. We define the constraints in object such properties:
public class User {
    @NotEmpty(message="First Name is required")
    private String firstName;
    @NotEmpty
    private String lastName;    
    @CodeValidator
    private String code;    
    @NotEmpty
    private String password;    
    @NotEmpty
    private String repassword;

.... 

}

For more details about validation annotations, have a look at Hibernate Validator,

3. Support validation JSR 303

To support JSR 303 in Spring application we modify the *-servlet.xml to add

<mvc:annotation-driven/>
or
<bean id="validator"
          class="org.springframework.validation.beanvalidation.LocalValidatorFactoryBean"/>

A JSR-303 provider, such as Hibernate Validator, is expected to be present in the classpath and will be detected automatically. 

4. Controller

In controller, when you want to validate an object, you put the @Valid annotation in front of its place, the framework will detect and make validation for us.
@RequestMapping(value = "/modifyUser", method = RequestMethod.POST)
    public ModelAndView updateUser(@Valid @ModelAttribute("user") User user, BindingResult bindingResult) {
        if (bindingResult.hasErrors()) {
            // show errors
            return new ModelAndView("modifyUser", "user", user);
        } else {
            // success
            return new ModelAndView("viewUser", "user", user);
        }   
    }

5. Configure ResourceBundle

  • Create new properties file in folder src/main/resources
  • Create new bean instance in *-servlet.xml to load resource file
<bean id="messageSource"
    class="org.springframework.context.support.ResourceBundleMessageSource">
    <property name="basename" value="application" />
</bean>

Normally, the error message must follow [Constraint].[Bean name].[Property name]

For example, the application.properties contains:
NotEmpty.user.firstName = First Name is required
NotEmpty.user.lastName = Last Name is required
NotEmpty.user.password = Password is required
NotEmpty.user.repassword = Retype password is required

6. Prepare JSP page

Do not have anything new in JSR 303 for JSP, you do it as well as Spring's Validator Interface
<tr>
    <td><form:label path="firstName">First Name</form:label></td>
    <td>
        <form:input path="firstName" />
        <form:errors path="firstName" class="errors" />
    </td>
</tr>

References:
Source code:
  • For the demonstration, please download source code from HERE
  • My repository on Github

SpringMVC Form Errors Tag and Validator Interface

In this article, we will discuss about <form:errors> tag and the Spring's Validator Interface

1. Create a new validator

Spring provides us a Validator interface that we can use to validate objects

For example, we implement a new validator to validate this User object
public class User {

    private String firstName;
    
    private String lastName;
    
    private String password;
    
    private String repassword;

....

}

The implementation of a validator looks like that

public class UserValidator implements Validator {

    @Override
    public boolean supports(Class<?> clazz) {
        return User.class.isAssignableFrom(clazz);
    }

    @Override
    public void validate(Object obj, Errors errors) {
        ValidationUtils.rejectIfEmptyOrWhitespace(errors, "firstName", "required.firstName", "Firstname is required.");
        ValidationUtils.rejectIfEmptyOrWhitespace(errors, "lastName", "required.lastName", "LastName is required.");
        
        User user = (User) obj;
        if (!user.getPassword().equals(user.getRepassword())) {
            errors.rejectValue("password", "notmatch.password");
        }
    }
}
Tip: To reject a field value, we can do like that:
errors.rejectValue("password", "notmatch.password");
The first argument is the field name, the second is the message.

2. Configure validator in controller


We need only 2 steps to enable the validation feature in controller:
  • Implement the function initBinder, this function will be invoked by framework when it binds data.
  • Add a binding result attribute to the action which you want to apply the validation, the <form:errors> tag looks at this attribute when it renders the error messages on form
In my controller:
@Autowired
@Qualifier("userValidator")
private UserValidator validator;

@InitBinder
protected void initBinder(WebDataBinder binder) {
    binder.setValidator(this.validator);
}

@RequestMapping(value = "/modifyUser", method = RequestMethod.POST)
public ModelAndView updateUser(@ModelAttribute("user") User user, BindingResult bindingResult) {
    validator.validate(user, bindingResult);
    if (bindingResult.hasErrors()) {
        // show errors
        return new ModelAndView("modifyUser", "user", user);
    } else {
        // success
        return new ModelAndView("viewUser", "user", user);
    }    
}

  • The Spring version used in this example is 3.x
  • The validator will be passed to controller automatically through @Autowired annotation
  • In initBinder function, we tell to Spring that to validate data of this controller, please use the UserValidator
  • At line 11, we have a new attribute with type BindingResult, this attribute will contain our binding result, and used by form:errors tag

3. Prepare the JSP

To show the errors of a field, we use this structure: <form:errors path="firstName"/>

To show the errors of all field, we set the value of path to * <form:errors path="*" />

For example:
<tr>
    <td><form:label path="firstname=">First Name<td>
    <td>
        <form:input path="firstName" />
        <form:errors path="firstName" class="errors" />
    </td>
</tr> 

References:
Source code:
  • For the demonstration, please download source code from HERE
  • My repository on Github

Friday, February 15, 2013

Multi View Resolver in Spring MVC

Sometime we need to have more than one view resolver in Spring MVC.

For example: We need benefit from JSP and also from template page

To resolve this problem, it's very simple in Spring MVC

Add these lines to your *-servlet.xml file:

<!-- Velocity template resolver -->
<bean 
 class="org.springframework.web.servlet.view.velocity.VelocityViewResolver">
 <property name="cache" value="true" />
 <property name="prefix" value="" />
 <property name="suffix" value=".vm" />
 <property name="order" value="1" />

 <!-- if you want to use the Spring Velocity macros, set this property to true -->
 <property name="exposeSpringMacroHelpers" value="true" />
</bean>
Note

Line 7: Tell to Spring that please use this view resolver first
<!-- JSP resolver -->
<bean id="viewResolver"
 class="org.springframework.web.servlet.view.InternalResourceViewResolver">
 <property name="prefix" value="/WEB-INF/views/" />
 <property name="suffix" value=".jsp" />
 <property name="order" value="2" />
</bean>
Note

Line 6: Tell to Spring that please use this after VelocityViewResolver

That's all thing we need to configure.

For the demonstration, please download Source code from my repository on Github

Use this links to invoke the appropriate features
For VelocityViewResolver: http://localhost:8080/multiresolver/fromvm
For InternalResourceViewResolver: http://localhost:8080/multiresolver/fromjsp

Integrating Velocity with Spring MVC

To integrate Velocity with Spring MVC, we create a Spring MVC by maven then follow these steps

1. Dependencies 

 Open pom.xml file, add these dependencies
<dependency>

 <groupId>org.apache.velocity</groupId>

 <artifactId>velocity</artifactId>

 <version>1.7</version>

</dependency>

<dependency>

 <groupId>org.apache.velocity</groupId>

 <artifactId>velocity-tools</artifactId>

 <version>2.0</version>

</dependency>

2. Context configuration 

 To enable the Velocity features, we need to define new VelocityConfigurer and VelocityViewResolver as shown bellow
<!-- This bean sets up the Velocity environment for us based on a root path 

  for templates. Optionally, a properties file can be specified for more control 

  over the Velocity environment, but the defaults are pretty sane for file 

  based template loading. -->

 <bean id="velocityConfig"

  class="org.springframework.web.servlet.view.velocity.VelocityConfigurer">

  <property name="resourceLoaderPath" value="/WEB-INF/views/" />

 </bean>


 <!-- View resolvers can also be configured with ResourceBundles or XML files. 

  If you need different view resolving based on Locale, you have to use the 

  resource bundle resolver. -->

 <bean id="viewResolver"

  class="org.springframework.web.servlet.view.velocity.VelocityViewResolver">

  <property name="cache" value="true" />

  <property name="prefix" value="" />

  <property name="suffix" value=".vm" />


  <!-- if you want to use the Spring Velocity macros, set this property to true -->

  <property name="exposeSpringMacroHelpers" value="true" />

 </bean>

3. Prepare a template file


<html>
    <body>
        <h1>Users:</h1> <br/>
        #foreach($user in $users)
         $user.name <br/>
        #end
    </body>
</html>

4. Finally, create a controller


package com.lapth82.springmvc.velocity.controller;

import java.io.IOException;
import java.util.ArrayList;
import java.util.HashMap;
import java.util.List;
import java.util.Map;

import javax.servlet.http.HttpServletResponse;

import org.springframework.stereotype.Controller;
import org.springframework.web.bind.annotation.RequestMapping;
import org.springframework.web.servlet.ModelAndView;

import com.lapth82.springmvc.velocity.model.User;

@Controller
public class HomeController {

 @RequestMapping(value="/")
 public ModelAndView test(HttpServletResponse response) throws IOException{
  
  User user1 = new User();
  user1.setName("lapth82");
  user1.setTitle("blogger");
  
  User user2 = new User();
  user2.setName("user2");
  user2.setTitle("blogger");
  
  List<User> lstUser = new ArrayList<User>();
  lstUser.add(user1);
  lstUser.add(user2);
  
  Map<String, List<User>> model = new HashMap<String, List<User>>();
  model.put("users", lstUser);
  
  return new ModelAndView("home", model);
 }
}


For the demonstration, please download Source code from my repository on Github

Create SpringMVC project by Maven in Eclipse

I assume that, you have the Eclipse with Maven plugin and run web application with Tomcat server

To create a Spring MVC project by Maven in Eclipse, just follow these steps:

1. Create a sample project by:

Right click on Project Explorer -> New -> Other -> Maven -> Maven Project

Then find and select the "spring-mvc-archetype", as this figure


Then fill the group, artifact, ..., as this figure


Then finish, you will see the project likes this figure:


2. Re-configure project

Remove the package: com.lapth82.springmvc.config, we do not need it
Add applicationContext.xml in WEB-INF
Add springmvc-servlet.xml in WEB-INF
Rename "HomeController" to "SpringMVCController" (not important)

3. Change the content of these files:

The web.xml:
<?xml version="1.0" encoding="UTF-8"?>
<web-app version="2.4" xmlns="http://java.sun.com/xml/ns/j2ee"
xmlns:xsi="http://www.w3.org/2001/XMLSchema-instance"
xsi:schemaLocation="http://java.sun.com/xml/ns/j2ee http://java.sun.com/xml/ns/j2ee/web-app_2_4.xsd">
<display-name>Spring MVC</display-name>
<welcome-file-list>
<welcome-file>index.html</welcome-file>
</welcome-file-list>
<listener>
<listener-class>org.springframework.web.context.ContextLoaderListener</listener-class>
</listener>
<servlet>
<servlet-name>springmvc</servlet-name>
<servlet-class>org.springframework.web.servlet.DispatcherServlet</servlet-class>
<load-on-startup>1</load-on-startup>
</servlet>
<servlet-mapping>
<servlet-name>springmvc</servlet-name>
<url-pattern>/</url-pattern>
</servlet-mapping>
<session-config>
<session-timeout>30</session-timeout>
</session-config>
</web-app>

The springmvc-servlet.xml:
<?xml version="1.0" encoding="UTF-8"?>

<beans xmlns="http://www.springframework.org/schema/beans"
       xmlns:xsi="http://www.w3.org/2001/XMLSchema-instance"
       xmlns:context="http://www.springframework.org/schema/context"
       xsi:schemaLocation=
       "http://www.springframework.org/schema/beans http://www.springframework.org/schema/beans/spring-beans.xsd
       http://www.springframework.org/schema/context http://www.springframework.org/schema/context/spring-context.xsd">
<context:component-scan base-package="com.lapth82.springmvc.controller" />
<bean id="viewResolver"
class="org.springframework.web.servlet.view.InternalResourceViewResolver">
<property name="prefix" value="/WEB-INF/views/" />
<property name="suffix" value=".jsp" />
</bean>
</beans>

The applicationContext.xml:
<?xml version="1.0" encoding="UTF-8"?>
<beans xmlns="http://www.springframework.org/schema/beans"
       xmlns:xsi="http://www.w3.org/2001/XMLSchema-instance"
       xsi:schemaLocation=
       "http://www.springframework.org/schema/beans http://www.springframework.org/schema/beans/spring-beans.xsd">

</beans>

The org.eclipse.wst.common.component:
<?xml version="1.0" encoding="UTF-8"?>
<project-modules id="moduleCoreId" project-version="1.5.0">
    <wb-module deploy-name="springmvc">
        <wb-resource deploy-path="/" source-path="/target/m2e-wtp/web-resources"/>
        <wb-resource deploy-path="/" source-path="/src/main/webapp" tag="defaultRootSource"/>
        <wb-resource deploy-path="/WEB-INF/classes" source-path="/src/main/java"/>
        <property name="context-root" value="springmvc"/>
        <property name="java-output-path" value="/springmvc/target/classes"/>
    </wb-module>
</project-modules>

4. Deploy SpringMVC project to Tomcat server
Normally, for the first time, we will receive message
SEVERE: Error configuring application listener of class org.springframework.web.context.ContextLoaderListener java.lang.ClassNotFoundException: org.springframework.web.context.ContextLoaderListener at org.apache.catalina.loader.WebappClassLoader.loadClass(WebappClassLoader.java:1714) at org.apache.catalina.loader.WebappClassLoader.loadClass(WebappClassLoader.java:1559) at org.apache.catalina.core.DefaultInstanceManager.loadClass(DefaultInstanceManager.java:527) at org.apache.catalina.core.DefaultInstanceManager.loadClassMaybePrivileged(DefaultInstanceManager.java:509) at org.apache.catalina.core.DefaultInstanceManager.newInstance(DefaultInstanceManager.java:137) at org.apache.catalina.core.StandardContext.listenerStart(StandardContext.java:4733) at org.apache.catalina.core.StandardContext.startInternal(StandardContext.java:5291) at org.apache.catalina.util.LifecycleBase.start(LifecycleBase.java:150) at org.apache.catalina.core.ContainerBase$StartChild.call(ContainerBase.java:1559) at org.apache.catalina.core.ContainerBase$StartChild.call(ContainerBase.java:1549) at java.util.concurrent.FutureTask$Sync.innerRun(FutureTask.java:334) at java.util.concurrent.FutureTask.run(FutureTask.java:166) at java.util.concurrent.ThreadPoolExecutor.runWorker(ThreadPoolExecutor.java:1145) at java.util.concurrent.ThreadPoolExecutor$Worker.run(ThreadPoolExecutor.java:615) at java.lang.Thread.run(Thread.java:722)

To resolve it, right click on the Spring MVC project -> Deployment Assembly -> Add -> Java Buil Path Entries -> Maven Dependencies -> Finish

For the demonstration, please download Source code from my repository on Github

Thursday, February 14, 2013

Json to Object by Jackson

To binding a JSON string to an object and vice versa we can use the library Jackson. Do not like the Marshaller and Unmarshaller in binding a XML to Object, we do not need any annotations in bean.
The User.java likes this:
public class User {

 private String userName;
 
 private String password;

 public User() {}
 
 public User(String userName, String password) {
  super();
  this.userName = userName;
  this.password = password;
 }

And the Group.java likes this:
public class Group {

 private String groupName;
 
 private List<User> lstUser;

 public Group() {}
 
 public Group(String groupName, List<User> lstUser) {
  super();
  this.groupName = groupName;
  this.lstUser = lstUser;
 }

Note: in these classes, we overload the default constructor, so we need to define the default constructor for Jackson Without this default constructor, we will receive an error message:
Exception in thread "main" org.codehaus.jackson.map.JsonMappingException: No suitable constructor found for type [simple type, class com.lapth82.jackson.example.bean.Group]: can not instantiate from JSON object (need to add/enable type information?)

To work with Jackson, just follow these steps:
Initializing Jackson:
ObjectMapper mapper = new ObjectMapper();

Writing an object to JSON:
String json = mapper.writeValueAsString(lstGroup);

Binding a JSON to Object:
List lstGroup = 
 mapper.readValue(
  json, 
  new TypeReference<List<Group>>(){}
);
at line 4: to bind a JSON to a list we must use TypeReference

See also: working with XML by using Marshaller and Unmarshaller

For the demonstration, please download Source code from my repository on Github

XML - Marshaller and Unmarshaller a list

I have this xml file, named sample.xml:
<?xml version="1.0" encoding="UTF-8" standalone="yes"?>
<group>
 <name> a group </name>
 <user>
  <name> user 1</name>
  <password> pass 1</password>
 </user>
 <user>
  <name> user 2</name>
  <password> pass 2</password>
 </user>
</group>

To bind this xml to an object, we create 2 classes:
1. Group.java
package com.lapth82.jaxb.bean;

import java.util.List;

import javax.xml.bind.annotation.XmlElement;
import javax.xml.bind.annotation.XmlRootElement;

@XmlRootElement(name = "group")
public class Group {

 private String groupName;
 
 private List lstUser;

 @XmlElement(name = "user")
 public List getLstUser() {
  return lstUser;
 }

 public void setLstUser(List lstUser) {
  this.lstUser = lstUser;
 }

 @XmlElement(name = "name")
 public String getGroupName() {
  return groupName;
 }

 public void setGroupName(String groupName) {
  this.groupName = groupName;
 }
}
2. User.java
package com.lapth82.jaxb.bean;

import javax.xml.bind.annotation.XmlElement;
import javax.xml.bind.annotation.XmlRootElement;

@XmlRootElement(name = "user")
public class User {

 private String userName;
 
 private String password;

 @XmlElement(name = "name")
 public String getUserName() {
  return userName;
 }

 public void setUserName(String userName) {
  this.userName = userName;
 }

 @XmlElement(name = "password")
 public String getPassword() {
  return password;
 }

 public void setPassword(String password) {
  this.password = password;
 }
}

Write a short code to test:
package com.lapth82.jaxb.test;

import java.io.File;

import javax.xml.bind.JAXBContext;
import javax.xml.bind.Marshaller;
import javax.xml.bind.Unmarshaller;

import com.lapth82.jaxb.bean.Group;

public class TestJAXB {

 public static void main(String[] args) throws Exception {
  JAXBContext jc = JAXBContext.newInstance(Group.class);
  
  Unmarshaller unMarshaller = jc.createUnmarshaller();
  Group group = (Group) unMarshaller.unmarshal(new File("xml/sample.xml"));
  
  group.getLstUser().get(1).setUserName("My Name");
  group.getLstUser().get(1).setPassword("My password");
  
  Marshaller marshaller = jc.createMarshaller();
  
  marshaller.setProperty(Marshaller.JAXB_FORMATTED_OUTPUT, true);
  
  marshaller.marshal(group, System.out);
 }
}

The result:
<?xml version="1.0" encoding="UTF-8" standalone="yes"?>
<group>
    <name> a group </name>
    <user>
        <password> pass 1</password>
        <name> user 1</name>
    </user>
    <user>
        <password>My password</password>
        <name>My Name</name>
    </user>
</group>

For the demonstration, please download Source code from my repository on Github

Code highlight with SyntaxHighlighter

Follow this steps to enable code highlight on your pages

1. Under head tag, insert this configuration:


Note: we can remove lines we do not need

2. All code within the pre tag will be highlighted

3. Test

<pre class="brush:java">

public static void main(String... args) {
   System.out.println("I am in Java");
}
</pre>


Result:

public static void main(String... args) {
   System.out.println("I am in Java");
}

References: http://alexgorbatchev.com/SyntaxHighlighter